How to import icons into your map (TFT)
| Step By Step Tutorial: How to Import Icons In Your Map (TFT) |
- You first need to download an Iconpack from this page. As an example we take the BTNAdvancedMoonGlaive from Mullar.
Download this Iconpack: BTNAdvancedMoonGlaive.zip (28.7 kilobytes)
-
You have downloaded the zip archive on your harddrive and now need to extract all files:
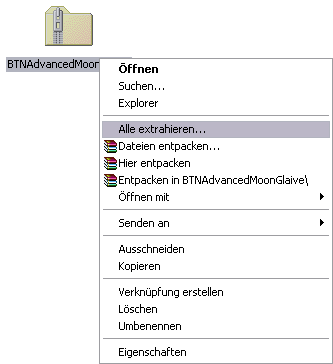
Right-Click the zip file and choose "Extract All" from the Menu.
You alternatively can use WinRAR or WinZip to extract all files.
After you extracted all file you should have the following:
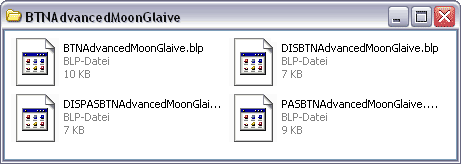
Note: Not all packs have all four versions of an icon. Some have only a BTN and some have additional DISBTN, PASBTN and DISPASBTN
- On the page where you downloaded the icon, you see the suggested paths for the icons:
Use the following paths: ReplaceableTextures\CommandButtons\BTNAdvancedMoonGlaive.blp
ReplaceableTextures\CommandButtonsDisabled\DISBTNAdvancedMoonGlaive.blp
ReplaceableTextures\PassiveButtons\PASBTNAdvancedMoonGlaive.blp
ReplaceableTextures\CommandButtonsDisabled\DISPASBTNAdvancedMoonGlaive.blp
If you dont like the name of the icon you can also rename it. The rule is this:
- Every iconpack needs the Prefix "BTN" for normal button, "DISBTN" for the disabled version, "PASBTN" for the passive icon and "DISPASBTN" for the disabled passive button.
- The end of the icon must be ".blp" - All icons of the same pack needs the same name.
Example:
You want this icon to be named as RazorWheel, the paths are:
BTN + RazorWheel + .blp = BTNRazorWheel.blp
DISBTN + RazorWheel + .blp = DISBTNRazorWheel.blp
PASBTN + RazorWheel + .blp = PASBTNRazorWheel.blp
DISPASBTN + RazorWheel + .blp = DISPASBTNRazorWheel.blp
-
Now you open your map in World Editor and go to the Import Manager (F12 key).
There you import all files from the zip file. In our case the four button files:

-
You propably noticed that the imported
files all show a path like "war3mapImported\BTNAdvancedMoonGlaive.blp". This is wrong and you need to adjust all paths.
To edit a path of an imported file you double click it and then check the "Use custom path" checkbox. Now enter the correct path.
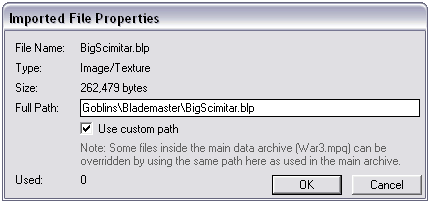
war3mapImported\BTNAdvancedMoonGlaive.blp --> ReplaceableTextures\CommandButtons\BTNAdvancedMoonGlaive.blp
war3mapImported\DISBTNAdvancedMoonGlaive.blp --> ReplaceableTextures\CommandButtonsDisabled\DISBTNAdvancedMoonGlaive.blp
war3mapImported\PASBTNAdvancedMoonGlaive.blp --> ReplaceableTextures\PassiveButtons\PASBTNAdvancedMoonGlaive.blp
war3mapImported\DISPASBTNAdvancedMoonGlaive.blp --> ReplaceableTextures\CommandButtonsDisabled\DISPASBTNAdvancedMoonGlaive.blp
Now your import manager should look like this:

- The World Editor wont recognize your icon yet. You must save your map first and quit World Editor. Now start World Editor up again and load your map.
- Now you can assign the icon to a unit, ability e.t.c in the object editor.
Darky27